Copyright (C) 2000-2006 Mike Sebastian.

Casio Calculator Self-Test Functions

fx-65
fx-82TL
fx-115ES
fx-115MS
fx-115W
fx-270W
fx-300ES
fx-300MS
fx-300W
fx-6200G
fx-6300G
fx-7300G
fx-7400G
fx-7400G PLUS
fx-7700GBUS
OH-7700GB (overhead projector calculator)
fx-7700GE
fx-8700GB
fx-9700GE
fx-9750G PLUS
fx-991ES
fx-991MS
fx-P401
CFX-9800G
CFX-9850G
CFX-9850Ga PLUS
CFX-9850GB PLUS


fx-65 with stacked fraction display

WARNING: Invoking the test described below will result in the clearing of data memory and mode settings. Further, this test requires partial disassembly of the calculator, which could result in permanent damage. See disclaimer.

The display self-test for the fx-65 is invoked by disassembling the calculator to locate the "TEST" pad located in the lower left corner (when looking at the back of the calculator) of the circuit board. Use something conductive, such as the tip of a screwdriver, to momentarily short the contacts. Repeated shorting of the "TEST" pad will cycle the display through four test patterns. The first test pattern is all segments energized, the second and third test patterns energize alternate segments, and the fourth test pattern is a blank display. Press clear or ON on the front of the calculator to exit the self-test. Of course, reassemble the calculator.


fx-82TL S-V.P.A.M. with 2-line display

WARNING: Invoking the test described below will result in the clearing of data memory and mode settings.

The fx-82TL has a display self-test, and a simple keyboard test.

Display Test. The display self-test for the fx-82TL is invoked by pressing and holding the SHIFT key, then pressing the reset button (labeled "P") located on the back of the calculator. The SHIFT key is pressed to advance through the display test patterns. The first test pattern energizes alternate rows of segments. The second test pattern is a blank display, the third and fourth test patterns energize alternate segments, and the fifth test pattern energizes all segments. Continuing to press the SHIFT key will cycle through the second through fifth display patterns.

Pressing the ALPHA key from the fifth test pattern (all segments energized), will restart the display self-test from the first pattern. Pressing the ALPHA key from the second test pattern (blank display), will display the fifth test pattern (pressing ALPHA again will restart the display self-test).

The reset button on the back of the calculator can be pressed at any time to exit the display self-test.

Keyboard Test. From any of the display test patterns, press the right-cursor key (Replay right key). However, it is recommended that the keyboard test only be invoked from the first or fifth test pattern. The display will shimmer while the key is held down (it appears that alternate rows of segments are being quickly energize and deenergized). You can then proceed to press any key, except the AC/ON, on the keyboard. The display will shimmer as long as a key is held down. Pressing the AC/ON key will exit the self-test and return the calculator to normal operation.


fx-115MS S-V.P.A.M. with 2-line display

WARNING: Invoking the test described below may result in the clearing of data memory and mode settings. (The storage registers are not cleared on either of my fx-115MS machines, but different ROM versions may behave differently.)

The display self-test for the fx-115MS is invoked in one of two ways depending on the ROM version. For the early version, simultaneously pressing the SHIFT and ON keys invokes the self-test function. On the more recent version, simultaneously pressing and holding the 7 and SHIFT keys then pressing the ON key invokes the self-test function. Pressing the SHIFT key thirteen times will cycle the display through each of the fourteen different test display patterns (the second pattern is a blank display). Pressing SHIFT twice more displays "0" and "1." Pressing ALPHA displays "2." (This looks like the beginning of the keyboard test for the fx-300MS, but there is no way to continue the keyboard test.) Pressing ON at any time exits the self test function.


fx-300MS and fx-991MS 1 S-V.P.A.M. with 2-line display

WARNING: Invoking the test described below may result in the clearing of data memory and mode settings. (The storage registers are not cleared on either my fx-300MS or fx-991MS, but different ROM versions may behave differently.)

The display self-test for the fx-300MS or fx-991MS is invoked by simultaneously pressing and holding the 7 and SHIFT keys then pressing the ON key (for some versions of the fx-991MS, simultaneously pressing the SHIFT and ON keys invokes the self-test 2). Pressing the SHIFT key fourteen times will cycle the display through each of the fourteen different test display patterns (the second pattern is a blank display). Zero will be displayed to signify the beginning of the keyboard test.

The keyboard test consists of pressing all keys, except for the ON key. The order of the first eleven keys is a little unusual. Then the order follows the traditional left-to-right top-to-bottom order. As each key is pressed in order, the number in the display increments by one. If a key is pressed out of order the number will not increment. The first eleven keys to be pressed on the fx-300MS are: SHIFT, ALPHA, MODE, cursor-left, cursor-up, cursor-right, x-1, nCr, Pol(, x3, and cursor-down. The first eleven keys to be pressed on the fx-991MS are: SHIFT, ALPHA, MODE, cursor-left, cursor-up, cursor-right, CALC, integration, x-1, CONST, and cursor-down. Then, starting with a b/c on the third row, continue pressing the keys from left-to-right, from the third row down. After = (the last key of the keyboard test) is pressed, "OK" is displayed on the top line, and either a "4" (fx-300MS) or "1" (fx-991MS) on the bottom line of the display.

The self-test can be exited at any time by pressing ON.

1 fx-991MS self-test data reported by Rolf Viehmann and Sergei Frolov.
2 Reported by Ian Bush.


fx-115W and fx-300W S-V.P.A.M. with 2-line display

WARNING: Invoking the test described below may result in the clearing of data memory and mode settings.

The fx-115W and fx-300W have a display self-test, and a simple keyboard test.

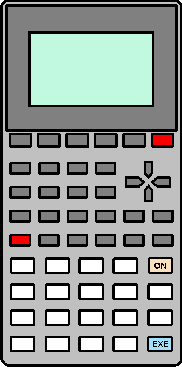
Display Test. The display self-test for the fx-115W and fx-300W is invoked by pressing and holding the 0 (zero) and SHIFT keys (highlighted in red in the illustration), then pressing the ON key (highlighted in green in the illustration). The first test pattern energizes alternate rows of segments. The second test pattern is a blank display, the third and fourth test patterns energize alternate segments, and the fifth test pattern energizes all segments. Continuing to press the SHIFT key will cycle through the second through fifth display patterns.

Pressing the ALPHA key from the fifth test pattern (all segments energized), will restart the display self-test from the first pattern. Pressing the ALPHA key from the second test pattern (blank display), will display the fifth test pattern (pressing ALPHA again will restart the display self-test).

The AC or ON can be pressed at any time to exit the display self-test.

Keyboard Test. From any of the display test patterns, press the right-cursor key (Replay right key). However, it is recommended that the keyboard test only be invoked from the first or fifth test pattern. The display will shimmer while the key is held down (it appears that alternate rows of segments are being quickly energize and deenergized). You can then proceed to press any key, except the AC or ON, on the keyboard. The display will shimmer as long as a key is held down. Pressing the AC or ON key will exit the self-test and return the calculator to normal operation.


fx-115ES1, fx-300ES, and fx-991ES1 with "Natural Display"

WARNING: Invoking the test described below will result in the clearing of data memory and mode settings.

The self-test for the fx-115ES, fx-300ES and fx-991ES is invoked by pressing and holding the 7 (seven) and SHIFT keys then pressing the ON key. Pressing the SHIFT key will cycle the display through each of five test display patterns (one pattern is a blank display). Pressing the ON key exits the self-test.

After the five display patters are displayed, a menu like the following will be displayed (this menu is from my fx-300ES, the ROM and MODE may vary):

     ROM 018
     MODE P3
     Press AC

Press AC. A contrast test screen will be displayed.

     CONTRAST
     11h
     LIGHT       DARK
      [<]        [>]

Pressing the cursor-left and cursor-right keys will change the contrast setting value ("11h" in the above illustration) and the visible contrast of the display.

Press AC to continue on to the keyboard test. "00" is displayed in the upper-left corner of the display to indicate the start of the keyboard test.

The keyboard test consists of pressing all keys, except for the ON key. The order of the first eleven keys is a little unusual. Then the order follows the traditional left-to-right top-to-bottom order. As each key is pressed in order, the number in the display increments by one. If a key is pressed out of order the number will not increment. The first eleven keys to be pressed on the fx-300ES are: SHIFT, ALPHA, cursor-up, cursor-right, MODE, Abs, x3, cursor-left, cursor-down, x-1, and log. The first eleven keys to be pressed on the fx-115ES and fx-991ES are: SHIFT, ALPHA, cursor-up, cursor-right, MODE, CALC, integration, cursor-left, cursor-down, x-1, and log.

Then, starting with left key on the third row, continue pressing the keys from left-to-right, from the third row down. After = (the last key of the keyboard test) is pressed, the following exit menu is displayed:

     TEST OK
     Reset All
     Press ON

Press ON to complete and exit the self-test.

1 fx-115ES and fx-991ES self-test data reported by Jacob Poon.


fx-270W V.P.A.M. with 2-line display

WARNING: Invoking the test described below will result in the clearing of data memory and mode settings.

The display self-test for the fx-270W is invoked by pressing and holding the OFF key, then pressing the reset button (labeled "P") located on the back of the calculator. The AC/ON key is pressed to advance through the four display test patterns. The first test pattern is a blank display, the second and third test patterns energize alternate segments, and the fourth test pattern energizes all segments. The reset button on the back of the calculator must be pressed to exit the self-test.


fx-6200G and fx-6300G Graphing Calculators

WARNING: Invoking the test described below may result in the clearing of data memory, program memory and mode settings. Further, invoking this test requires partial disassembly and possible modifications to the calculator, which could result in permanent damage. See disclaimer before dissassembly or modification.

The display self-test for the fx-6200G and fx-6300G is invoked by repeated closure of the "TEST" pad located on the back of the PCB of the calculator. See the Radio Shack EC-4033 self-test discussion for more details.


fx-7300G and fx-7400G Graphing Calculators

WARNING: Invoking the tests described below will result in the clearing of data memory, program memory, and mode settings. Further, invoking this test using the alternative method for the fx-7400G, described below, requires partial disassembly and possible modifications to the calculator, which could result in permanent damage. See disclaimer before dissassembly or modification.

These two casio calculators have built-in internal, display, and keyboard tests. With the calculator off, the test mode is activated by pressing and holding the two keys highlighted in red on the illustration at the right, then pressing the AC/ON key. A menu of test options is presented.

Each test is activated by pressing the number for the appropriate test. For the display test, press the EXE key (in blue on the illustration at the right) to step through each display pattern until until the test option menu is again displayed. The keyboard test requires the pressing of each key in order, generally from the upper-left, to the lower-right; the calculator prompts you to press the appropriate key. The RAM and ROM tests will display "- OK -" when the test finishes successfully; the EXE key must be pressed to return to the test option menu.

The self test is exited by selecting option zero. With the fx-7400G you must additionally answer "yes" (by pressing F1) to the "reset all memories?" prompt (the calculator will eventually lock-up if you answer "no," necessitating a hard reset using the reset button on the back of the calculator).

As an interesting note, the fx-7400G has a pair of pads on the circuit board which, when momentarily shorted, will also invoke the self-test mode. With the calculator facing down, and the battery cover removed, the self-test pads are the two D-shaped pads under the grey piece of tape to the left of the back-up battery. The switch above the words "BACK UP" must be pushed up to turn the calculator on before shorting the pads. The switch must be pushed back down before the battery cover is replaced.


fx-7400G PLUS Graphing Calculator

WARNING: Invoking the test described below will result in the clearing of data memory, program memory, and mode settings.

The fx-7400G PLUS has built-in internal, display, and keyboard tests. With the calculator off, the test mode is activated by pressing and holding the key in the upper-right corner of the keyboard and a b/c key (the two keys highlighted in red on the illustration above), then pressing the AC/ON key. The "ZX942 TEST" page is displayed. Seven tests plus a reset option may be chosen.

The self test functions differ from the older fx-7400G in several subtle but significant ways. First and most importantly, once the RAM test is completed, instead of returning to the self test menu, self test is exited and RAM is cleared - avoiding the problem of the calculator locking up if RAM was not expressly cleared. Second, the ROM test displays more information about the test. Third, a "Cycle Test" has been added which cycles repeatedly through the display test until interrupted.

Each test is activated by pressing the number for the appropriate test.

Display Test. For the display test, test number 1, press the EXE key (in blue on the illustration above) to step through each display pattern until until the test option menu is again displayed.

Keyboard Test. The keyboard test, test number 2, requires the pressing of each key in order, generally from the upper-left, to the lower-right; the calculator prompts you to press the appropriate key. The test option page is redisplayed once the test is completed

ROM Test. The ROM test, test number 3, displays the ROM version and size and will display check sum data and "- OK -" when it finishes successfully. The EXE key must be pressed to return to the test option menu.

Tests numbers 4 and 5 are exited by pressing the AC/ON key.

RAM Test. The RAM test, test number 6, will display "- OK -" when the test finishes successfully. The EXE key must be pressed, but does not return to the test option menu. Instead, RAM is cleared, and the self test mode is exited.

Cycle Test. The Cycle test, test number 7, will cycle through the LCD display test repeatedly. This test is started by pressing the EXE key. This test can be exited at any time by pressing the AC/ON key, and then the EXE key which clears the memory and exits the self test mode.

The test mode is exited by selecting option zero. The message "RESET ALL MEMORIES?" will be displayed, and you will be asked to press "yes" or "no."


fx-7700GBUS and OH-7700GB Graphing Calculators

WARNING: Invoking the test described below will result in the clearing of data memory, program memory, and mode settings.

The fx-7700GBUS and OH-7700GB have built-in internal, display, and keyboard tests. With the calculator off, the test mode is activated by pressing and holding the F6 and a b/c keys (the two keys highlighted in red on the illustration above), then pressing the AC key. A menu of test options is presented. Each test is activated by pressing the number for the appropriate test.

Display Test. The pixel display test, test number 1, requires pressing the EXE key to step through each display pattern until the test option menu is again displayed. (Note that the first test pattern is all pixels off.)

Keyboard Test. The keyboard test, test number 2, requires the pressing of each key in order, generally from the upper-left, to the lower-right (the order the cursor keys need to be pressed is a little unusual). The calculator prompts you to press the appropriate key.

RAM Test. The RAM test, test number 3, will display "<< RAM OK >>" when the test finishes successfully. Press the EXE key to return to the test option menu.

ROM Test. The ROM test, test number 4, displays what appears to be a checksum (my calculators display 0112C62E) when the test finishes. The EXE key must be pressed to return to the test option menu.

The test mode is exited by selecting option zero. You must additionally press EXE to the "*** RESET ALL ***" prompt (the calculator may eventually lock-up otherwise, necessitating a hard reset using the reset button on the back of the calculator).


fx-7700GE Graphing Calculator

WARNING: Invoking the test described below will result in the clearing of data memory, program memory, and mode settings.

The fx-7700GE has built-in internal, display, and keyboard tests. With the calculator off, the test mode is activated by pressing and holding the F6 and a b/c keys (the two keys highlighted in red on the illustration above), then pressing the AC key. A menu of test options is presented. Each test is activated by pressing the number for the appropriate test.

Display Test. The pixel display test, test number 1, requires pressing the EXE key to step through each display pattern until the test option menu is again displayed. (Note that the first test pattern is all pixels off.)

Keyboard Test. The keyboard test, test number 2, requires the pressing of each key in order, generally from the upper-left, to the lower-right (the order the cursor keys need to be pressed is a little unusual). The calculator prompts you to press the appropriate key.

RAM Test. The RAM test, test number 3, will display "<< RAM OK >>" when the test finishes successfully. Press the EXE key to return to the test option menu.

ROM Test. The ROM test, test number 4, displays what appears to be a checksum (my calculator displays 00A6C77D) when the test finishes. The EXE key must be pressed to return to the test option menu.

Test number 5 is the transmit/receive test for the data link.

The test mode is exited by selecting option zero. RAM is automatically cleared as evidenced by the "RESET ALL MEMORIES!" message.


fx-8700GB Graphing Calculator

WARNING: Invoking the test described below will result in the clearing of data memory, program memory, and mode settings.

The fx-8700GB has built-in internal, display, and keyboard tests. With the calculator off, the test mode is activated by pressing and holding the F6 and a b/c keys (the two keys highlighted in red on the illustration above), then pressing the AC key. A menu of test options is presented. Each test is activated by pressing the number for the appropriate test.

Display Test. The display test, test number 1, requires pressing the EXE key to step through each of five test patterns until the test option menu is again displayed. (Note that the first test pattern is all pixels off.)

Keyboard Test. The keyboard test, test number 2, requires the pressing of each key in order, generally from the upper-left, to the lower-right (the order the cursor keys need to be pressed is a little unusual). The calculator prompts you to press the appropriate key.

RAM Test. The RAM test, test number 3, will display "<< RAM OK >>" when the test finishes successfully. Press the EXE key to return to the test option menu.

ROM Test. The ROM test, test number 4, displays what appears to be a checksum (my calculator displays 0112D12E) when the test finishes. The EXE key must be pressed to return to the test option menu.

Test number 5 is the transmit/receive test for the data link.

The test mode is exited by selecting option zero. RAM is automatically cleared as evidenced by the "** RESET ALL **" message.


fx-9700GE Graphing Calculator

WARNING: Invoking the test described below will result in the clearing of data memory, program memory, and mode settings.

The fx-9700G has built-in internal, display, and keyboard tests. With the calculator off, the test mode is activated by pressing and holding the F6 and a b/c keys (the two keys highlighted in red on the illustration above), then pressing the AC/ON key. A menu titled "LX370 TEST" is displayed. Press 1 to display the standard test option menu. Each test is activated by pressing the number for the appropriate test.

Display Test. The pixel display test, test number 1, requires pressing the EXE key to step through each display pattern until the test option menu is again displayed.

Keyboard Test. The keyboard test, test number 2, requires the pressing of each key in order, generally from the upper-left, to the lower-right. The calculator prompts you to press the appropriate key.

RAM Test. The RAM test, test number 3, will display "RAM OK" when the test finishes successfully. Press the EXE key to return to the test option menu.

(There is no ROM test.)

The test mode is exited by selecting option zero. You must additionally answer "yes" (by pressing F1) to the "reset all memories?" prompt (the calculator will eventually lock-up if you answer "no," necessitating a hard reset using the reset button on the back of the calculator).


fx-9750G PLUS Graphing Calculator

WARNING: Invoking the test described below will result in the clearing of data memory, program memory, and mode settings.

The fx-9750G has built-in internal, display, and keyboard tests. With the calculator off, the test mode is activated by pressing and holding the F6 and a b/c keys (the two keys highlighted in red on the illustration above), then pressing the AC/ON key. A menu of test options is presented. Each test is activated by pressing the number for the appropriate test.

     GY355 TEST MODE

      1.Cnt   6.ROM
      2.LCD   7.RAM
      3.KEY   8.CYC
      4.DET   0.Rst
      5.TRS

Contrast Test. The contrast display test, test number 1, simply displays the contrast adjustment menu. Pressing the left and right coursor keys will adjust the contrast. Exit the test by pressing the EXIT key. The main test menu is redisplayed.

Display Test. The pixel display test, test number 2, will display five differnt test patterns. Press the EXE key to step through each display pattern and redisplay the main test option menu.

Keyboard Test. The keyboard test, test number 3, requires the pressing of each key in order, generally from the upper-left, to the lower-right. The calculator prompts you to press the appropriate key. Upon successful completion of the test, the main test option menu is redisplayed.

ROM Test. The ROM test, test number 6, will display "ROM OK" along with some other information when the test finishes successfully. This test takes approximately six seconds. The EXE key must be pressed to return to the test option menu.

RAM Test. The RAM test, test number 7, will display "RAM OK" along with some other information when the test finishes successfully. The EXE key must be pressed, but does not return to the test option menu. Instead, the message "MEMORY CLEARED!" is displayed, RAM is cleared, and the self test mode is exited.

Cycle Test. The Cycle test, test number 8, will cycle through the LCD display test (five display test patterns) four times and the RAM test once before starting over. This test is started by pressing the EXE key. This test can be exited at any time by pressing the AC/ON key, and then the EXE key which clears the memory and exits the self test mode.

Tests numbers 4 and 5 are exited by pressing the AC/ON key. There are several submenus under test 5. Many of these tests require extra test equipment.

The test mode is exited by selecting option zero. The message "RESET ALL MEMORIES?" will be displayed, and you will be asked to press "yes" or "no."


CFX-9800G Color Graphing Calculator

WARNING: Invoking the test described below will result in the clearing of data memory, program memory, and mode settings.

The CFX-9800G has built-in internal, display, and keyboard tests. With the calculator off, the test mode is activated by pressing and holding the F6 and a b/c keys (the two keys highlighted in red on the illustration above), then pressing the AC/ON key. A menu of test options is presented. Each test is activated by pressing the number for the appropriate test.

Display Test. The pixel display test, test number 1, requires pressing the EXE key to step through each display pattern until the test option menu is again displayed.

Keyboard Test. The keyboard test, test number 2, requires the pressing of each key in order, generally from the upper-left, to the lower-right. The calculator prompts you to press the appropriate key.

ROM and RAM Tests. The RAM and ROM tests, test numbers 3 and 4, will display "RAM OK" or "ROM OK," as appropriate, when the test finishes successfully. The EXE key must be pressed to return to the test option menu.

Contrast Test. The contrast display test, test number 7, is activated by pressing the EXE key. Unlike the CFX-9850G, this test just pulls up the contrast page accessable during normal operation of the calculator. Press EXIT to return to the test options menu.

The test mode is exited by selecting option zero. You must additionally answer "yes" (by pressing F1) to the "reset all memories?" prompt (the calculator will eventually lock-up if you answer "no," necessitating a hard reset using the reset button on the back of the calculator).


CFX-9850G Color Graphing Calculator

WARNING: Invoking the test described below will result in the clearing of data memory, program memory, and mode settings.

The CFX-9850G has built-in internal, display, and keyboard tests. With the calculator off, the test mode is activated by pressing and holding the F6 and a b/c keys (the two keys highlighted in red on the illustration above), then pressing the AC/ON key. A menu of test options is presented. Each test is activated by pressing the number for the appropriate test.

Contrast Test. The contrast display test, test number 1, is activated by pressing the EXE key. For approximately 10 seconds the contrast will automatically change. At the end of the test, the "INIT" and "IN-A" prompts will appear in the lower left corner of the display. The contrast test is exited by pressing the EXIT key, which returns you to the test options menu. (NOTE: if the contrast test is run after the RAM test, the calculator will lock up, necessitating a hard reset using the reset button on the back of the calculator).

Display Test. The pixel display test, test number 2, requires pressing the EXE key to step through each display pattern until the test option menu is again displayed.

Keyboard Test. The keyboard test, test number 3, requires the pressing of each key in order, generally from the upper-left, to the lower-right. The calculator prompts you to press the appropriate key.

ROM and RAM Tests. The ROM and RAM tests, test numbers 6 and 7, will display "ROM OK" or "RAM OK," as appropriate, when the test finishes successfully. The EXE key must be pressed to return to the test option menu.

Tests numbers 4 and 5 are exited by pressing the AC/ON key.

The test mode is exited by selecting option zero. You must additionally answer "yes" (by pressing F1) to the "reset all memories?" prompt (the calculator will eventually lock-up if you answer "no," necessitating a hard reset using the reset button on the back of the calculator).


CFX-9850Ga PLUS and CFX-9850GB PLUS Color Graphing Calculators

WARNING: Invoking the test described below will result in the clearing of data memory, program memory, and mode settings.

The CFX-9850Ga PLUS and CFX-9850GB PLUS have built-in internal, display, and keyboard tests. With the calculator off, the test mode is activated by pressing and holding the F6 and a b/c keys (the two keys highlighted in red on the illustration above), then pressing the AC/ON key. A menu of test options is presented. Each test is activated by pressing the number for the appropriate test.

The self test functions differ from the older CFX-9850G in several subtle but significant ways. First and most importantly, once the RAM test is completed, instead of returning to the self test menu, self test is exited and RAM is cleared - avoiding the problem of the calculator locking up if RAM was not expressly cleared. Second, both the ROM and RAM self tests display more information about the test. Third, a "Cycle Test" has been added which cycles through the LCD and RAM tests until interrupted.

Contrast Test. The contrast display test, test number 1, is activated by pressing the EXE key. For approximately 9 seconds the contrast will automatically change. At the end of the test, the "INIT" and "IN-A" prompts will appear in the lower left corner of the display. The contrast test is exited by pressing the EXIT key, which returns you to the test options menu.

Display Test. The pixel display test, test number 2, requires pressing the EXE key to step through each display pattern until the test option menu is again displayed.

Keyboard Test. The keyboard test, test number 3, requires the pressing of each key in order, generally from the upper-left, to the lower-right. The calculator prompts you to press the appropriate key.

ROM Test. The ROM test, test number 6, will display "ROM OK" along with some other information when the test finishes successfully. The EXE key must be pressed to return to the test option menu.

RAM Test. The RAM test, test number 7, will display "RAM OK" along with some other information when the test finishes successfully. The EXE key must be pressed, but does not return to the test option menu. Instead, RAM is cleared, and the self test mode is exited.

Cycle Test. The Cycle test, test number 8, will cycle through the LCD display test four times and the RAM test once before starting over. This test is started by pressing the EXE key. This test can be exited at any time by pressing the AC/ON key, and then the EXE key which clears the memory and exits the self test mode.

Tests numbers 4 and 5 are exited by pressing the AC/ON key.

The test mode is exited by selecting option zero. The message "RESET ALL MEMORIES?" will be displayed, and you will be asked to press "yes" or "no."


fx-P401 Programmable Calculator

See the Radio Shack EC-4040 self-test discussion.


BACK HOME


Last updated October 27, 2006